Importing Data into Excel
In Excel, use File > Open as shown below. Change to the \xView directory,
or wherever the xView data is stored, and change the file type to Text Files.
If this is right you will see a list of files as shown.
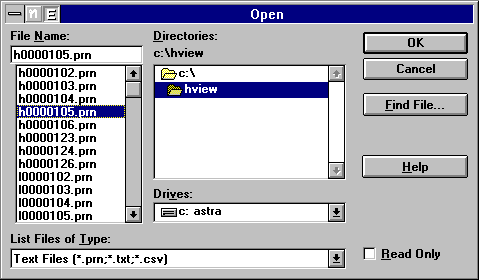
Figure 83 — Excel Open dialog: opening a text file (filter *.prn;*.txt;*.csv)
from the xView directory
Select the file you want and press  . The Import Wizard
then runs, in three steps.
. The Import Wizard
then runs, in three steps.
Step 1
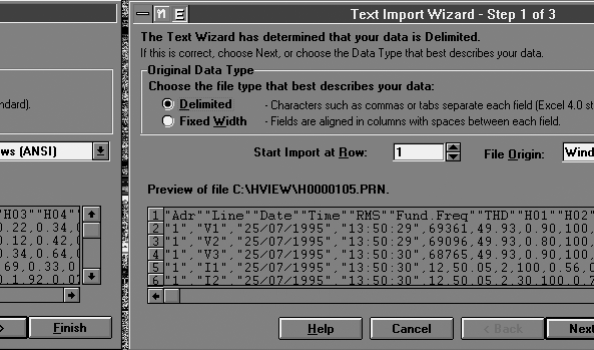
Figure 84 — Step 1 of the import
-
Set Original Data Type to Delimited
-
Start Import at Row 1
-
File Origin: Windows (ANSI)
Press
 to go to the next step.
Step 2
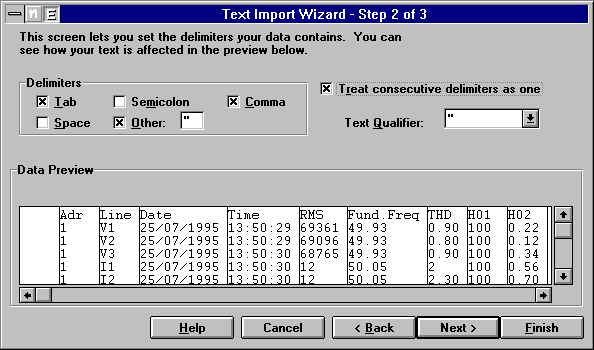
Figure 85 — Text Import Wizard step 2: setting the delimiters (Tab, Comma, Other: ")
-
Under Delimiters, tick Tab, Comma and Other, and put a double quote (") in the Other box
-
Tick Treat consecutive delimiters as one
-
Set Text Qualifier to the double quote (")
The Data Preview pane then shows the data correctly split into columns. In the example, the RMS column reads 69361 because this is a high voltage (69 kV).
Press
to go to the next step.
Step 3
This step sets the characteristics of each individual column.
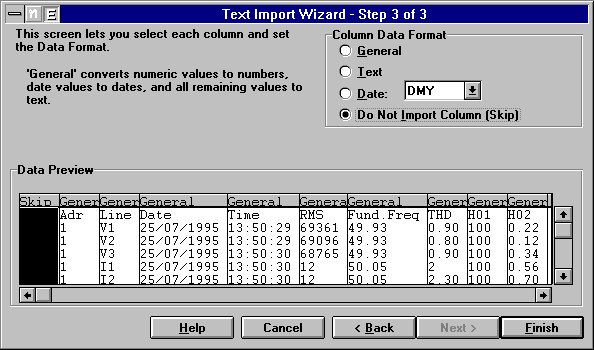
Figure 86 — Text Import Wizard step 3 (setting column 1 to Skip)
-
When importing harmonic data as in this example, set the Column Data Format of column 1 to Do Not Import Column (Skip), as shown.
-
Select the Date column in the Data Preview pane and set its Column Data Format to Date: DMY, as shown.
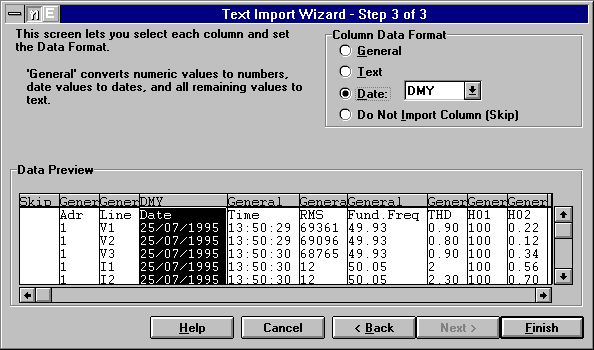
Figure 87 — Text Import Wizard step 3 (setting the Date column to Date: DMY)
When you have finished, press  . The data then appears on
screen as shown.
. The data then appears on
screen as shown.
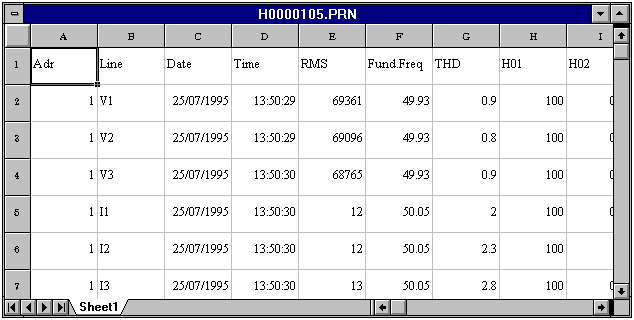
Figure 88 — Example of imported data in Excel (H0000105.PRN — the Adr, Line, Date, Time, RMS, Fund.Freq, THD, H01 and H02 columns)